
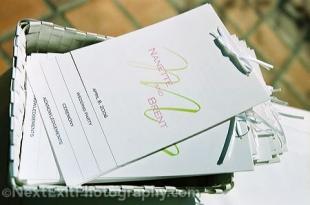
<font size="2" face="Georgia">Layered wedding programs are extremely classy and are very useful when you intend to have a lot of information in your program.</font>
Layered wedding programs are extremely classy and are very useful when you intend to have a lot of information in your program. Layered wedding programs act as a menu to the events taking place and can include the events of the reception as well as the ceremony to make you guest feel even more informed. Get beautiful wedding program papers here.


Tools and Materials Needed:
- As many sheets of paper for as many layers as you want (I would use cardstock as the backing for sure, and a either a type of vellum paper or cardstock for the layers).
- Scissors or Paper Trimmer 12"
- Ribbon
- Hole punch
- Computer and printer
- Eyelet setting tools (optional)
- Eyelets
(optional)
Free Downloadable Templates:
There are two different types of layered wedding program templates you can download. The first is 4 1/4" wide by 10 1/2" long. The second is 5 1/2" wide by 8" long. I made each one in two different line weights. The light one is for printing on light-colored paper, while the dark lineweight is for printing on darker-colored paper. There is also a background sheet made in each size, which may or may not be used. The background sheet is used for a layer of cardstock underneath all the other layers. For the top part of the background sheet (the part to be folded over), it is made 1/8" longer than the top part on the layered program templates to ensure that it will cover all of the material beneath it. There are two background sheet templates for the 4 1/4" X 10 1/2" size program. One is on legal size paper (8" X 14"), while the other is on letter (8 1/2" X 11). The difference between the two templates is the size of the top part (the part to be folded over). On the letter size paper the top part is only 1" because there is not enough room to make the top size 1/8" longer as described above. The legal size paper contains a template with the top part 1/8" longer than the layered program sheets.
Layered Program Templates
Backround Sheet Templates
Instructions:
- Once you download the template you have chosen for your layered wedding programs, you can personalize/format the text. Images can also be inserted onto the programs by clicking INSERT and then PICTURE from the top menu in Word. You can then chose an image file or clipart. Once the image is inserted, you can then right click on the image and click on FORMAT PICTURE. Under the LAYOUT tab select BEHIND TEXT under the wrapping style. Click OK. Now you can move the image to where you would like it.
- Next you can print all the layered programs.
- Once the layered programs are printed, you can cut all the layers. It takes a lot less time to cut the layered programs if you use a paper trimmer for the straight edges.
- Line up all the layers of one program, and punch two holes through all the layers of the program where the circles are located. This is where your ribbon will go through.
- Now you will want to fold the 1-inch flap at the top of the programs over. Once the flap is folded over, you will need to punch two holes through the backside of the flap to match the holes that were folded over with the flap.
- For a more finished look, you can insert and set eyelets where the holes are. Once the eyelets are set or if you don't want to have eyelets in the holes, you can simply loop a ribbon through the hole and tie a bow.
Category: